Tuesday, July 22, 2014
Random peek...
I generally don't do full outfit reveals before a conventions. I mean... All that hard work/ research/ and scheming? Seems a shame to open the box too soon. So today I have a few more winking peeks into the studio.
Monday, July 7, 2014
progress...sweet progress
We (my friend Gina from Beauty for Ashes and I ) have a firm plan, we have patterns and fabric we have a rather disgusting amount of accessories. Really- what could go wrong?
So I buckled down and got my beading pattern enlarged, altered, and simplified into a workable pattern.
I know blogs are all about the photos...seriously- that is what we are all here for right? Well in classic " I have a convention coming up" fashion I won't be doing a see all tell all until I wear this dress but I can share a little (wink)
And some recent progress photos...
Thursday, May 15, 2014
Move all the things!
Move All The Things!
So here we go before
"All the things!" Will be living in my bonus room for about a week.
Really, there are a few things.
Off we go. I like to use what I have, what I have is common sense, and an 18 ft flat bed trailer and minions. Seriously common sense is so uncommon it should be a super power.
Thursday, May 8, 2014
A quick corset lacing post
Occasionally I am asked to show how to lace a corset. So let me start by saying this is not "my" method. Most modern corsets are laced much this way. However, it is nice to have a photo guide to remind you if you find yourself in need of removing and re-lacing your corset.
Corsets can be tied with one, two or even three laces. I use one lace and get good results. I wear corsets as foundation pieces for historical costuming. I don't tight lace, that is generally where two or three laces are found.
So, from the top...
Start with your lace at the top of the corset, the center of the lace starts under the corset, and the ends come out through the first grommet.
Then much like shoe laces you cross over and lace through the second grommet.
At this point you could continue laceing like a shoe. However, after the lace is centered and anchored with the top two grommets I like to lace one stide of the string skipping every other grommet as seen here. Stop at the top of the waist. To do this simply note which two grommets are placed at the smallest part of the waist. Depending on the corset this may be below the middle of the grommets. The loops used to adjust the corset will be made here.
Next lace down the other side picking up all the grommets you just skipped and stop at the top of the waist.
Make your loops. To do this I generally pull the string out to the front edge of the corset then bring it back in to the grommets and place the string through the next grommet on the same side you are already on. These loops can be adjusted up and down to snug the fit of the corset once on as needed.
Note the lace goes out and comes in on the same side for the loop and your laces are now coming out from under the corset.
Cross the string so that the "shoe lacing" pattern can begin again.
Bring each lace end out through the next grommet.
Lace down to the bottom of the corset on one side skipping every other grommet again.
Lace through with the second lace end picking up all the grommets you just skipped.
Tie your laces off. I like to tie mine at a grommet on the outside of the corset. This is below the waist where, in costume, there is a great deal of volume and the knot will not break the line of your clothing. The knot being on a grommet and between two bones will also not dig into your body, this will be very much a boon after a long day in costume.
And that is how I lace a corset. This is again a simple and common method that I feel does the job of securing a corset and allowing adjustments well. I hope this reference will come in handy.
Monday, May 5, 2014
Five foundations challenge...Finally!
So apparently I'm the queen of procrastination but it's cut sew time or go without time. As is often the case I'm starting with foundation pieces.
Thanks so much to Mistress of Disguise for coming up with the perfect challange to get me going.
On with my first of the five foundations. #2 is corsets and stays. I am making a regency era corset from the Laughing Moon pattern. The fabric is two layers of cotton linen.the pattern calls for cotton sateen, I for some reason have this notion that before Victoria everyone lived in linen. Silly I know but I purchased the fabric before reading the pattern, another vice, and I am just going to muddle forth. I have decided to hand sew this corset, less because it's historically accurate and more because my machine is currently in the shop for the next 10 days. So with it out for a well deserved and much needed tune up, I have the chance, without the catch net of a machine standing by, to make a corset by hand. Something I have always wanted to do but can easily talk myself out of.
This is a new gadget I'm liking, it is a Fons and Porter making pencil which erases from fabric. The point is sharp for making accurate marks. The "leads" come in a dark or a white.
I like long fine needles...long and VERY fine. English needles are my favorite however they become more difficult to find here in the United States. These are the latest needles I am trying and so far I am very pleased with them. So if your curious this is what I am using. ** edit- these are, after looking more closely made in England! So there you have it...want good fine needle? English.
I took the advice given in the pattern to stay stitched around the edges of all the pieces first to keep the fabric from raveling. See? I'm not all sew and go, I can be taught.
The wrong side of the first gusset.
The right side of the first gusset.
First cup complete.
One layer done.
The front piece of the corset and lining with gussets complete.
The hip gussets marked and slit.
The first hip gusset in, here from the right side.
First set of his gussets in progress. Today's reading of the pattern, tracing the pattern, cutting, and hand sewing totals up to about seven hours sewing time. All but four hip gussets (the lining) are complete at this point.
And with that...I have officially accepted the Five Foundations Challange!
Thursday, April 24, 2014
Seven outfits eleven weeks.
Well thats the long and the short of it. In eleven weeks I need to be ready for Costume College 2014. We have friends from Northern Ireland coming for a visit in July, after they head back across the pond I will have about a week before I fly to California. I need that week to clean house and pack. So dear ones, that means counting backwards from the visit I have eleven weeks for seven outfits.
Now the good news, they are not all insanely intricate, tedious, or grand Victorian gowns. So time for some projects is much shorter than others. The bad news, I am at the moment disgustingly lacking in corsets and will need a late Victorian, and a 1910 and a regency at a bare minumum. I'd like to have a 1903 and a black 1910 to round out the undies but I can get by with three..not less. More news on the nervous side. I am tackeling a regency dress and bonnet and need the whole era from the skin out, why this makes the hair on the back of my neck rise I will never understand but there you go- butterflies over a simple line with minimum undergarments.
While all these thoughts float around my head I am smack in the middle of insulating my studio and drywalling. Which happily is going so much faster than I could have dreamed and has made a huge (huge!) difference to the enviorment in my little zone 9A south TX metal building studio. Once we get drywall up I will be removing everything from the studio that is not coco required. This is a tactic to keep me focused and limit my ADD/OCCD where by I sometimes get so distracted by ideas I get little done. Looking at my stash through tranlucent bins can trigger this effect.
So I will have my cork boards with dress images, to-do lists and project drawers. I will most likely be listening to "Time management from the inside out" on a continous loop. Yes this is me giving myself a hard kick combined with a pep talk.
Here is the studio... I know you are thinking where in the name of blogging are the pictures?!
A bit of a mess no? That is ok, I actually enjoy cleaning and organizing, very cathartic that. The white white insulation makes the room very bright indeed and something about white space is very productive for me. If I paint it will be a pale color so close to white as to be barely noticable.
So what will I be making? What is on this list of must? Without giving too much away here it is.
Regency corset
Victorian corset
1910 corset
regency petti
plain bloomers
a bathing VBS or a 1940 easy breezy dress (one or the other not both)
a 1920's dress
short black petti
cloche hat
reticule (optional)
The Wearing History Suit Along (note to self learn to link with the ipad app!)
Regency dress
Regency bonnet
Gala dress (yep thats all I'm gonna say about that!)
Breakfast gown
Black Ascot (because seriously who does not love that theme?)
Epic hat
So thats it, seven outfits with various pieces to flesh them out and underthings to make them lay.
Brought to you during my retreat week with the hubbie...see what happens when I have time to think?
Wednesday, February 26, 2014
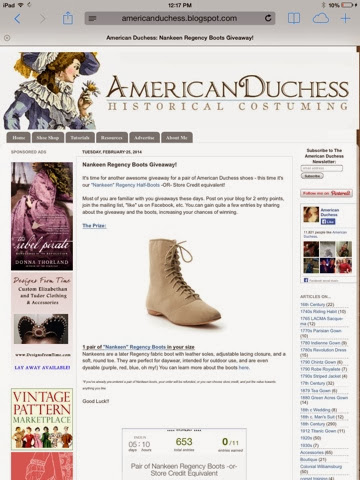
Regency Era boots by American Duchess!
I am not normally one to enter contests but my goodness I could use some regency era boots! So here goes! Look! American Dutchess is doing a give away and I'm hoping with fingers crossed! Check 'em out!
You can pre order them here
Subscribe to:
Posts (Atom)